Pan-fried Stuffed Chicory is a clear example of how a simple ingredient can be turned into a truly satisfying dish with very little effort. Chicory, often treated as a side vegetable, becomes the star here: with the right handling and just a few well-chosen ingredients, it turns into something full of flavour and substance.
The secret lies entirely in the filling. Anchovies and capers, together with olives and the gentle sweetness of raisins, create a very interesting balance of saltiness, depth and freshness. These are ingredients that also tell the story of the relationship between nature and human intervention: both anchovies and capers develop their distinctive character through preservation processes such as salting, which enhances their flavour and complexity.
From a nutritional point of view, anchovies provide high-quality protein and are a good source of Omega-3 fatty acids, which support cardiovascular health and have anti-inflammatory properties. Capers — typically used in small quantities — add aromatic compounds and a good level of antioxidants. Together, they give the dish plenty of flavour without the need for much else.
The result is a naturally gluten-free recipe (when using gluten-free breadcrumbs), complete and well balanced, also ideal for preparing in advance and enjoying warm or at room temperature. Another simple way to bring more vegetables to the table without compromising on taste.
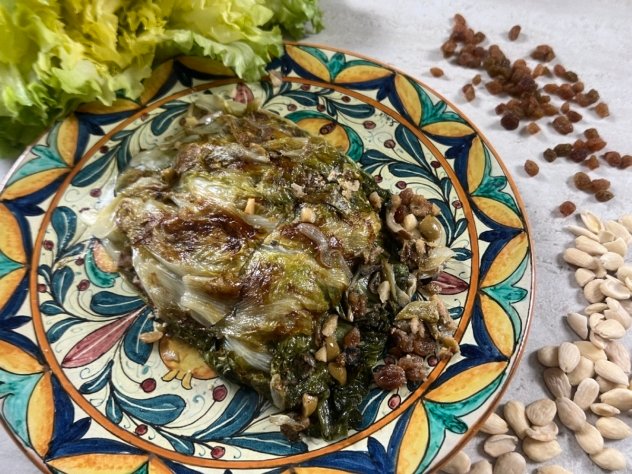
Pan-fried Stuffed Chicory
11.4g carbohydrates per 100g
Ingredients
- 1 head of chicory
- 125 g pitted black and green olives*
- 35 g peeled almonds
- 35 g desalinated capers
- 30 g breadcrumbs**
- 25 g raisins
- 5 anchovy fillets
- 1 clove of garlic
- parsley
- extra virgin olive oil
- salt and pepper
**Ingredients specific for celiacs
*Ingredients whose labels must read “gluten-free” (or, in Italy, present on Prontuario AIC)
Preparation
- Wash the chicory thoroughly and trim off the tough base of the stem.
- Roughly chop the almonds, a handful of parsley, the olives, capers and anchovy fillets.
- Gently open the leaves and stuff with the chopped mixture, adding raisins and breadcrumbs between the layers. Tie the chicory with kitchen string to hold it together.
- Heat a drizzle of olive oil in a deep frying pan and brown the garlic. Add the stuffed chicory and brown over a high heat for about 10 minutes. Cover with a lid and continue cooking gently for around 30 minutes.
- Serve warm or cold, with its cooking juices, a sprinkle of parsley and freshly ground black pepper.