Giro d’Italia in 20 recipes
Mamma Giovanna’s Gluten-free Bread Cake
Some recipes are not “just” desserts. They are family photographs, inherited gestures, silent comforts that come back to life the moment a familiar scent fills the kitchen.
For the Lombardy stage of my Giro d’Italia in 20 Recipes, I asked my friend Simonetta which recipe she has missed the most since being diagnosed with coeliac disease. With palpable emotion, Simonetta told me about her recipe of the heart: Bread Cake, the cake her mum Giovanna used to make for her, using bread—even leftover bread—and just a few simple ingredients, as was once the tradition.
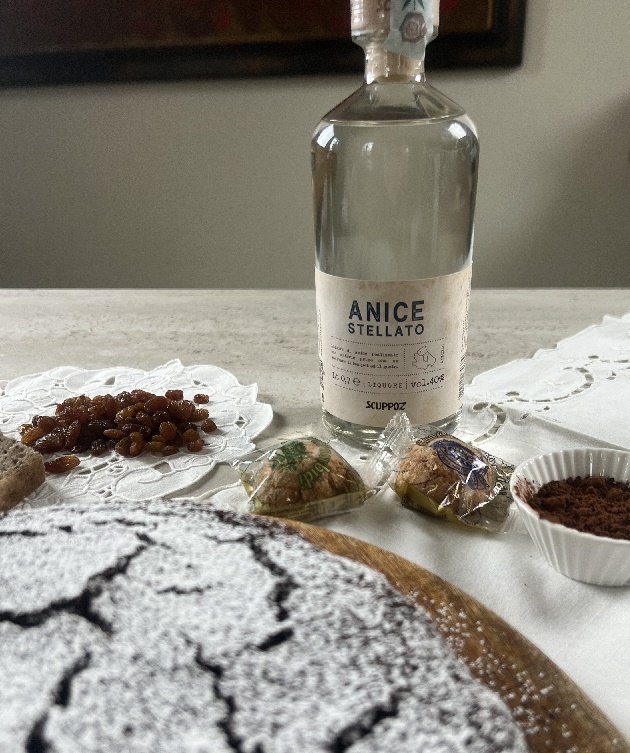
Torta Paesana is a dessert rooted in rural cooking, born from the art of wasting nothing and turning what you had in the pantry into something special: bread, milk, eggs, cocoa, dried fruit, biscuits… and that unmistakable “home” aroma that lingers in your memory.
Simonetta’s story really moved me. Since her coeliac diagnosis, she has never found the courage to remake this cake in a gluten-free version.
Not because she doesn’t miss it—quite the opposite—but because some recipes are so deeply tied to memories that the fear of “getting them wrong” can be overwhelming. And so, even today, she still prepares it with regular bread for her husband and friends, choosing not to taste it herself.
This is exactly where the meaning of this project comes in: giving people with coeliac disease back the pleasure of their heart recipes, those that seemed lost forever, the ones that nourish not only the body but also the soul.
I made Simonetta a promise: I will bring her my gluten-free Bread Cake to taste, hoping not to disappoint her and to rekindle the joy she felt as a child.
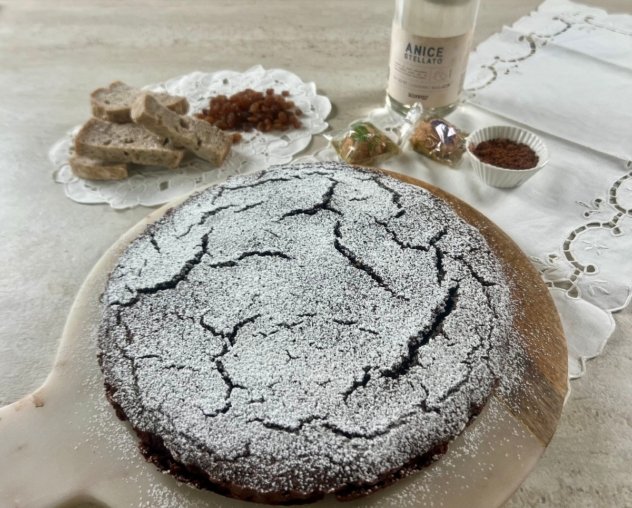
Mamma Giovanna’s Gluten-free Bread Cake
32.5g carbohydrates per 100g
Ingredients
- 1–1.5 litres milk
- 1 small glass anise liqueur*
- 330g soft amaretti biscuits* (Sassello-style)
- 50g unsweetened cocoa powder*
- 50g sweetened cocoa powder*
- 50g raisins
- 30g pine nuts
- 100g plain dry biscuits** (Oro Saiwa-style)
- 200g milk rolls**
- 2 eggs
- 40g melted butter
- 1 vanilla pod
- 1 sachet baking powder*
- lemon zest
- icing sugar* (optional)
- a pinch of salt
**Ingredients specific for celiacs
*Ingredients whose labels must read “gluten-free” (or, in Italy, present on Prontuario AIC)
Preparation
- Soak the bread in a large bowl with 1 litre of hot milk (add more if needed). Ideally, do this the evening before baking the cake, or in any case leave it long enough for the bread to completely break down.
- Once the bread has fully softened, add the finely crumbled amaretti and biscuits, the well-beaten eggs, melted butter, baking powder, pine nuts, raisins, lemon zest and a pinch of salt.
- Line a 26 cm cake tin with baking paper that has been dampened and squeezed dry. Pour in the mixture and bake in a preheated static oven at 200°C (390°F) for about 1 hour.
- The cake should be soft and fragrant. Dust the surface with icing sugar to cover any cracks that may form on top during baking.